Posts Tagged Windows

Introducing Orchid Album for PC

Track your orchid collection on your Windows PC – Now Available!

“Orchid

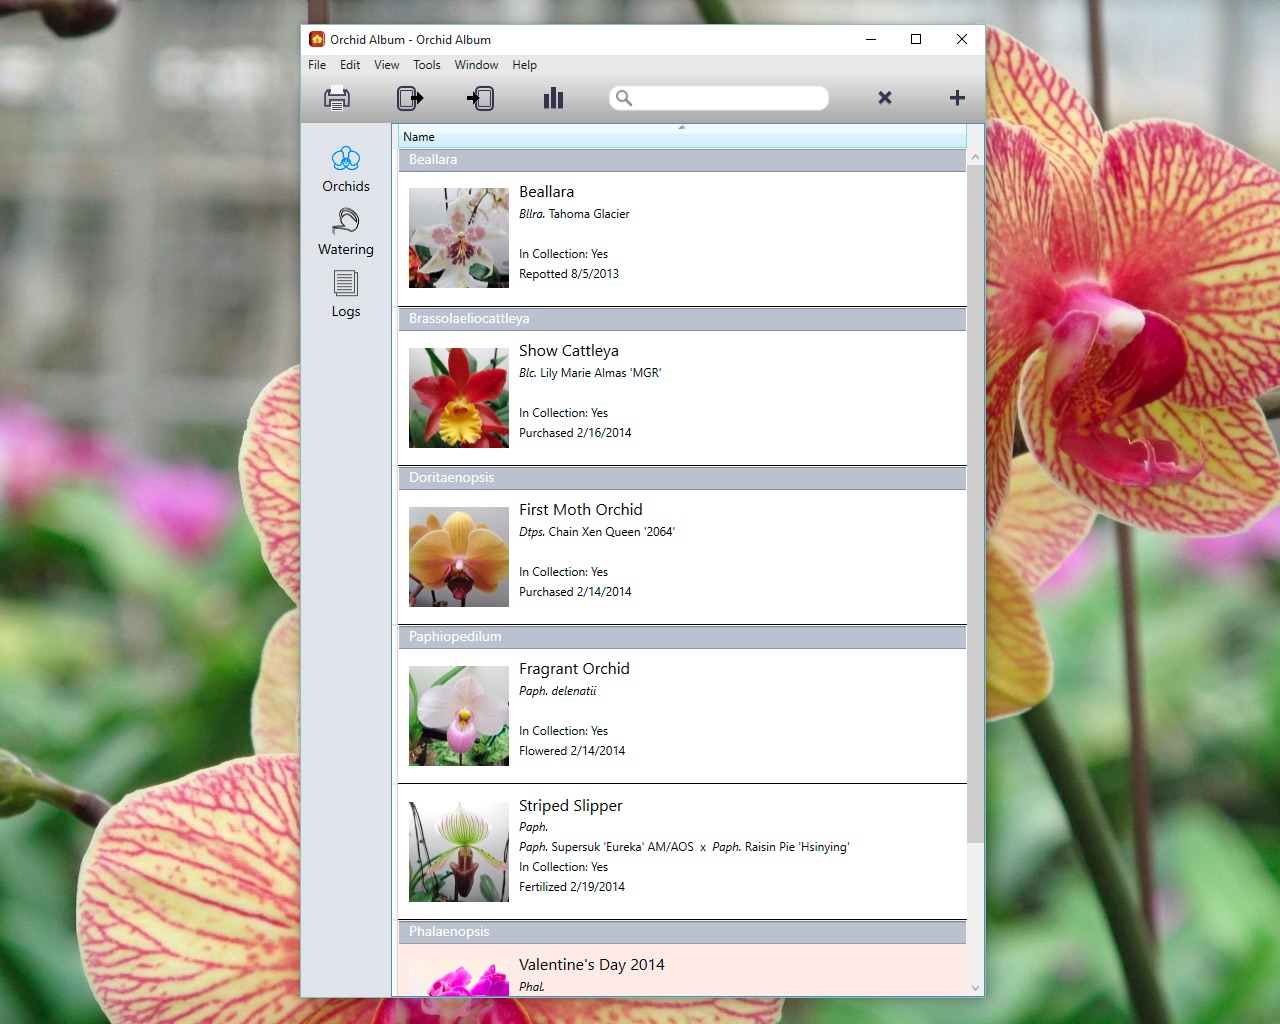
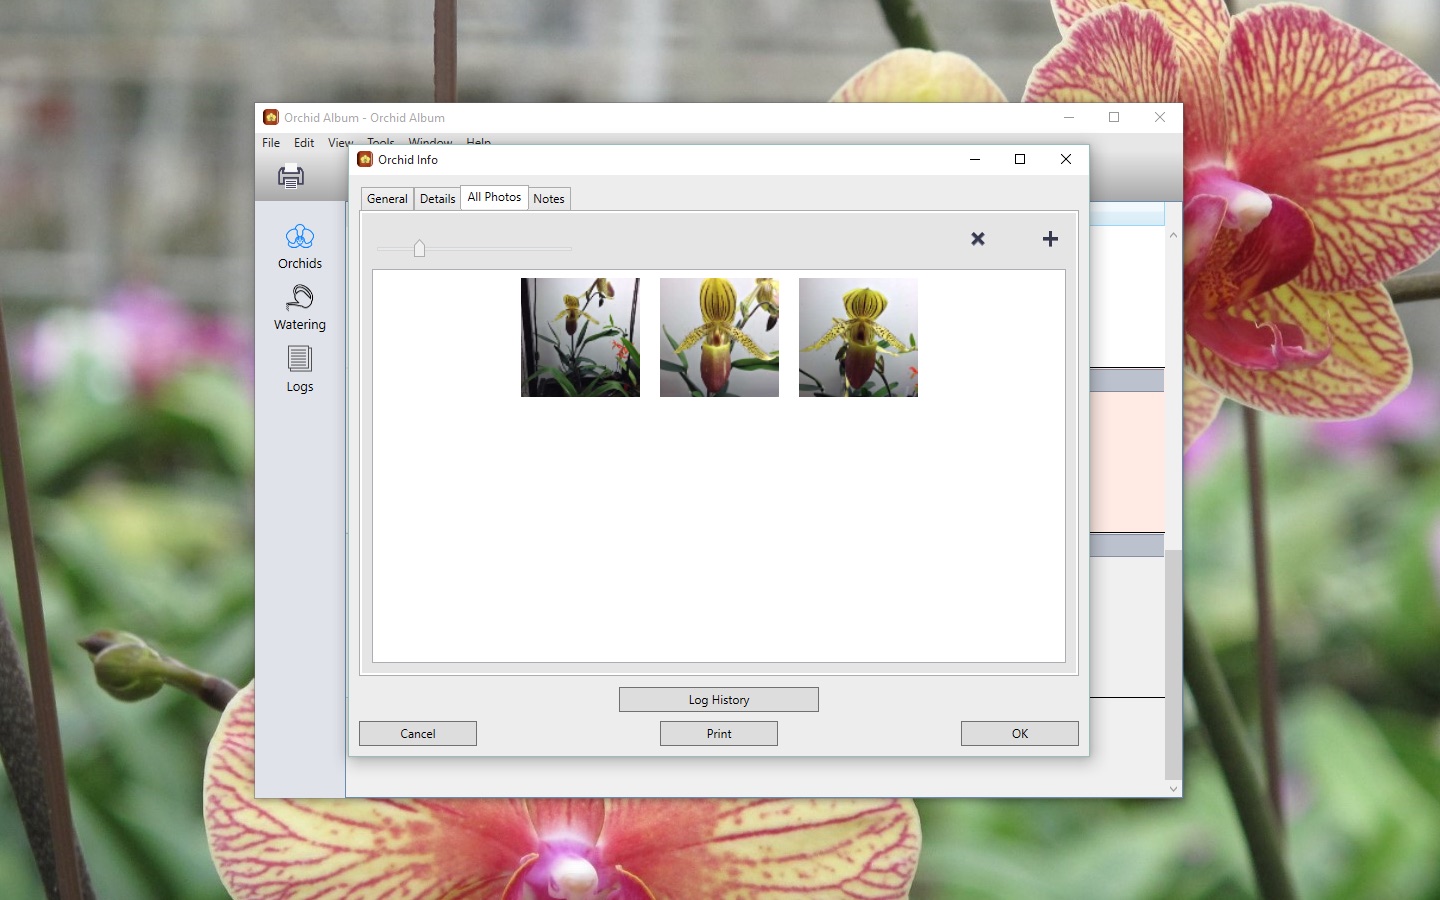
Today I’m pleased to announce the release of my new PC app, Orchid Album. If you’re an orchid collector and are looking for a tool to make keeping track of your plants easier, you can’t go wrong with this.

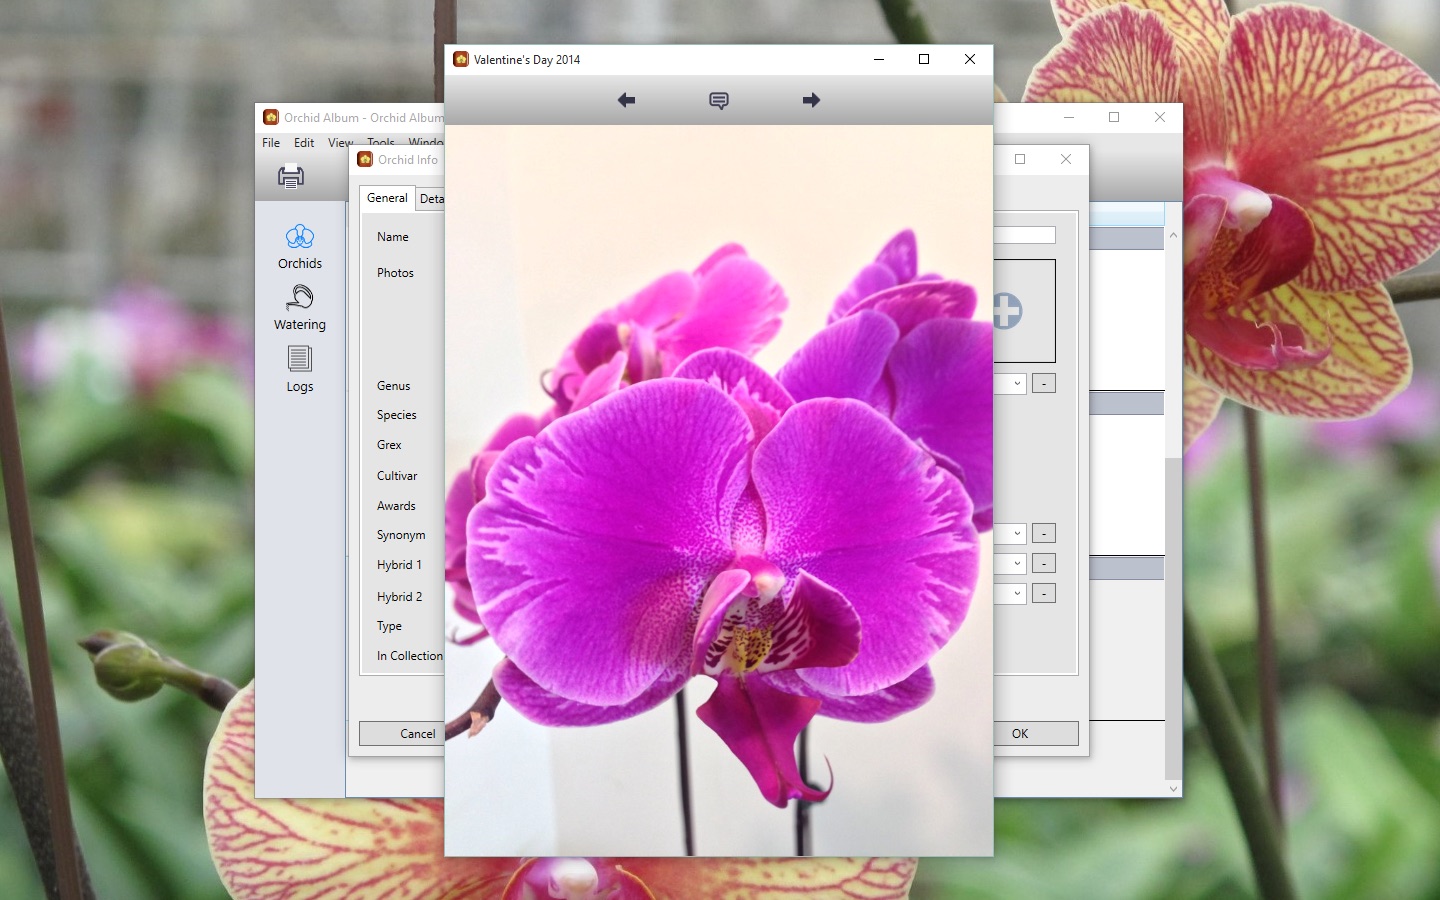
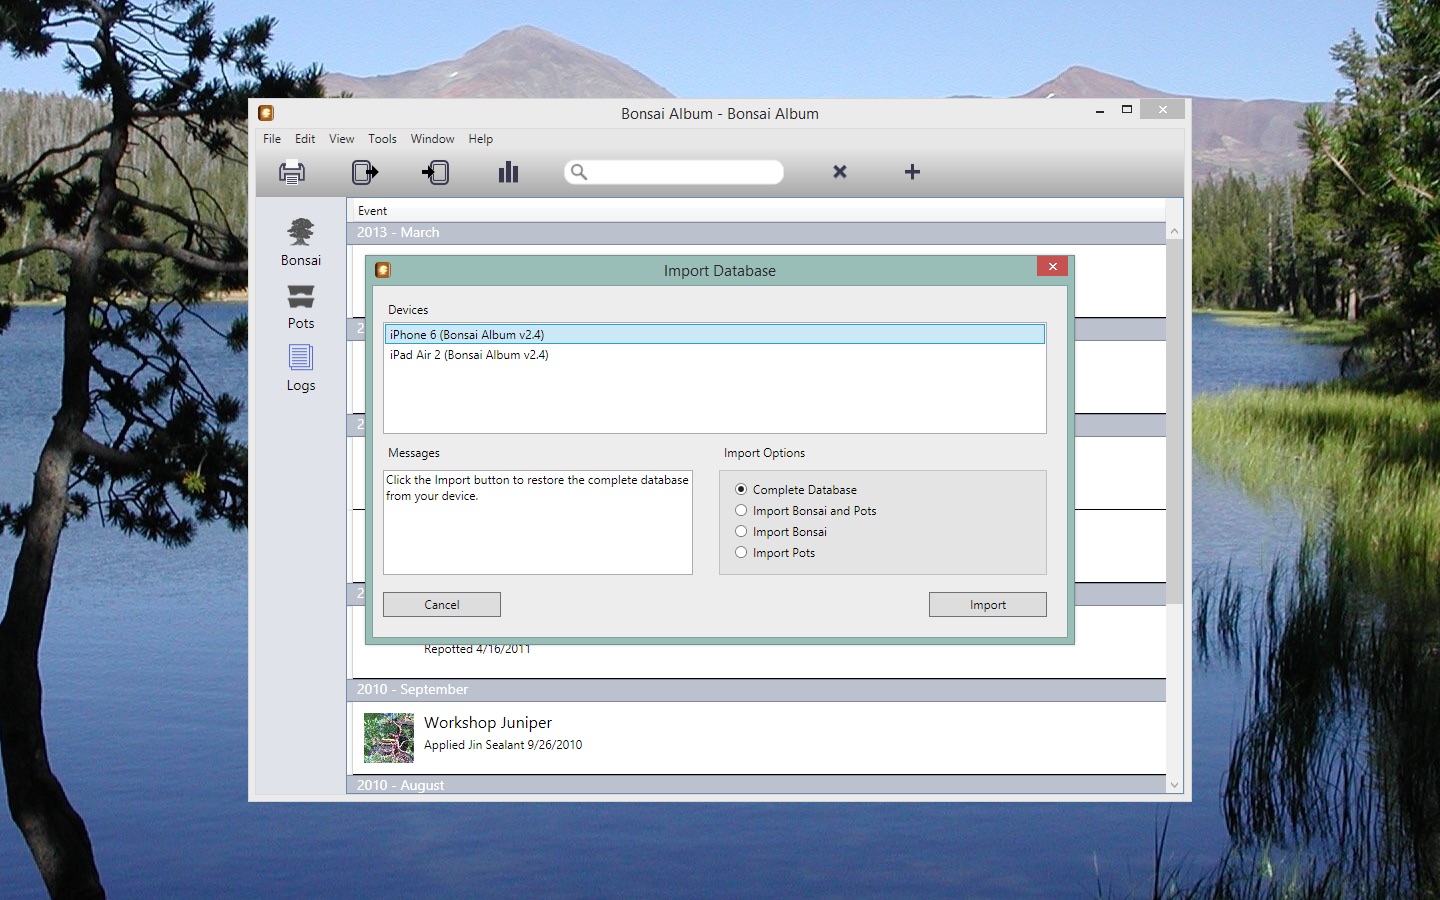
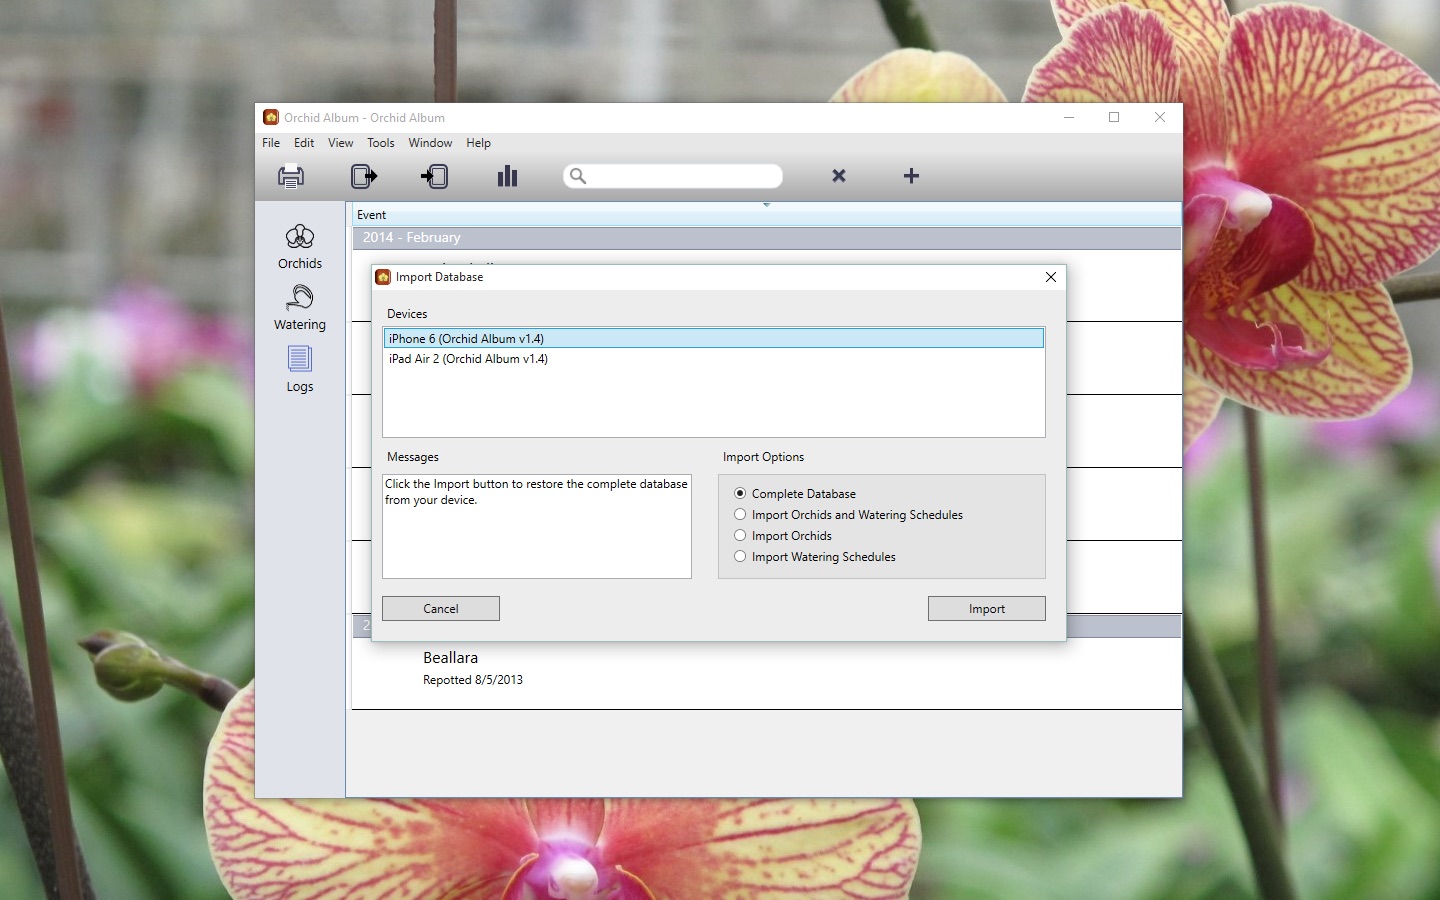
The PC version has many of the same features as the iOS version, with the addition of printing. enhanced search capabilities, and data transfer to and from the iOS version over WiFi. I’ve also included some other features like duplicating orchid entries, right-click context menus, and a host of other tweaks and improvements. Orchid Album for PC also has a built-in crash-reporting mechanism and software update notifications.

Localization into multiple languages is very important for modern apps. The PC version of Orchid Album is localized into English (obviously!), French, Italian, German, Spanish, and Portuguese. This also includes every aspect of the installation and ordering process. Clicking on any of the links below will take you to the information page for the app in each language:

English, Français, Italiano, Deutsch, Español, Português

To use Orchid Album on your PC, you’ll need either Windows XP SP3, Windows Vista, Windows 7, Windows 8 / 8.1, or Windows 10. The app also requires the Microsoft .NET Framework 4 with the KB2468871 update patch.

The download version initially runs in an unregistered trial mode, limited to 3 orchids, 3 watering schedules, and 3 logs, with 3 photos each. It will also only allow a single database to be open at a time, and database import is disabled. The full feature-set can be unlocked via purchase, either within the app or via my Web Store

DownloadBuy Now

You can learn more about all the features of Orchid Album here, check out the Frequently Asked Questions page, or like Orchid Album on Facebook.

I’d like to thank all the Beta testers for helping me polish the app, and to everyone else for their patience (especially family!) while I toiled away on it. I hope you’ll agree it was worth the wait!

Tags: , , , , , , ,

Orchid Album for PC – Frequently Asked Questions (FAQ)

Orchid Album for PC

The following should address any questions or concerns you may have about Orchid Album for PC. I’ll be updating this post as new questions arise. Let me know if I’ve missed anything!

1. When will Orchid Album be available for PCs?

Orchid Album for PC is now available for download from my website here. You can learn more about Orchid Album for PC here.

2. What operating system do I need to be able to run Orchid Album for PC?

The app works on Windows XP SP3 / Vista / 7 / 8 / 8.1 / 10 / 11. It requires the .NET Framework 4, which will be installed automatically if your computer does not already have it. It also requires the .NET KB2468871 update patch. Outlook 2010 is required to store reminders on your computer’s calendar.

3. I already have Orchid Album on my iPhone, iPad, or iPod touch. Do I have to buy it again for the PC?

Yes, if you would like to run Orchid Album on your PC, you’ll need to purchase it direct from my site. The PC version includes some additional features over and above the iOS version, including photo organization, enhanced search, and printing capabilities. The app had to be substantially re-designed and completely re-written for the PC platform. Unfortunately porting the app to the PC wasn’t as simple as you might think!

4. I’m not sure if Orchid Album for PC will suit my needs. Is there a free trial version available?

Yes, it’s available for download from my website here. The app is initially in an unregistered trial mode, limited to 3 orchids, 3 watering schedules, and 3 logs, with 3 photos each. It will also only allow a single database open at a time, and database import is disabled. That should be enough to give you some idea of whether the app will work for you. Purchasing a license either within the app or via my website unlocks full functionality.

5. Will Orchid Album for PC be localized into my language soon?

Possibly. Orchid Album is currently localized into English, French, Italian, German, Spanish, and Portuguese.

6. Is it possible to sort the orchids by genus, rather than name?

Click Preferences… on the Tools menu and select the “Sort orchids by genus” checkbox under Sort Options. Close the window and you’ll find all orchids are now sorted by genus. Repeat these steps to sort by name again.

7. What is the purpose of the Type field on the Log Info window?

The type field is used by the app to determine what should be displayed in the Logs list for that log entry. For instance, selecting Orchid will show the orchid name selected in the Orchid field, and Note will show a brief summary taken from the Notes field. Select either Orchid or Note in the Type field depending on what information that particular log entry is recording.

8. How do I re-order the photos on the Orchid Info or Log Info windows?

After the entry has been saved, double-click on it and then click on the All Photos tab. This will show all the photos associated with the Orchid or Log. Click and hold the mouse button on the photo you’d like to organize on the Info window, and move the mouse to where you’d like the photo to be moved. Release the mouse button when you’re done.

To move a photo into one of the primary photo slots on the Orchid Info or Log Info windows, arrange the photos in the All Photos section. The primary photo slots will now reflect the new order.

9. How do I add text captions to my photos? How can I hide them to take a closer look at the photo?

Double-click on the photo you’d like to add a caption to in the All Photos tab of the Orchid Info or Log Info window. Click the word balloon icon at the top of the window, then in the text box that appears, type in the text caption you’d like to associate with that photo. Click on the photo to end editing the caption. The new or modified text caption will now be displayed. Note that only the first few lines of the caption will be superimposed over the photo. To hide the caption, click once on the photo. You can scroll between the photos by clicking the left and right arrow buttons, and zoom-in by resizing the photo window.

10. How do I capture sold, stolen or dead plants, or other events?

The place for capturing these events is on the Log Info window. Create a new Log entry, click the Event field and type in the new Event (Sold, for instance). The new Event will be saved when you click the OK or Save button. It will then be available for use with this and other log entries. In the Orchid field, select the corresponding orchid. Set the Type field to Orchid. Set the date the Event occurred, and add any relevant photos or notes. Click Save, and the new dated Log entry will appear in the list. Now when you tap the Log History button on the Orchid Info window, you’ll see the complete history of the orchid.

11. I have an Orchid Album database on my iPhone, iPad, or iPod touch. How do I transfer it to Orchid Album for PC?

You’ll need all devices on the same local WiFi network as your PC. Then follow these steps:

(1) Tap the Backup Database button on the Tools screen within the app on your device.
(2) Create a new database within Orchid Album for PC and save it to your Documents folder.
(3) Click the Import Database button in the document window toolbar within Orchid Album for PC. This is the button next to the printer button. The button has an arrow pointing to the right, away from the device icon. You can also select the Import from -> Orchid Album Mobile App item in the File menu.
(4) The Import Database window will appear. You should see your device shown in the Devices section. If it isn’t there, double-check that you’ve selected Backup Database (or Export Database) on the Tools screen within Orchid Album on your device. Check the Messages box in Orchid Album for PC for helpful information.
(5) Select the device you want to import from, then select Restore Complete Database in the Import Options section. You may also choose to Import Orchids and Watering Schedules, Import Orchids, or Import Watering Schedules.
(6) Once you’re satisfied with the selected device and import options, click the Import button.
(7) After the progress bar completes, an alert will appear indicating whether the import was successful. Click OK.
(8) The database in Orchid Album for PC should now match the database on your device.

Note that the above steps will completely replace the contents of the Orchid Album database within Orchid Album for PC, unless you’ve chosen not to restore the complete database. In that case, you may see duplicate entries in your database after the import is complete.

12. I have an Orchid Album database in Orchid Album for PC I’d like to transfer to Orchid Album on my iPhone, iPad, or iPod touch. How do I accomplish this?

The steps are similar to question 11 above, except you must select either Restore Database or Import Database on your device, and click the Export Database button in the document window toolbar within Orchid Album for PC. This is the toolbar button with the arrow pointing toward the device icon. When the export is complete, you should consult the pop-up alert on your device for further instructions.

13. I have an iPad, an iPhone, and a PC. How do I keep the databases in sync between all of these devices?

Orchid Album currently doesn’t have a simple means of keeping databases synchronized on separate devices. However, it is still possible to transfer the database between devices manually. You first need to backup the database from the device with the most current copy to your computer (or from your computer to the device). The steps for achieving this are shown above in questions 11 and 12. A good workflow is to use your PC as a hub for the database, updating that after you’ve made changes on your device.

14. I have the Orchid Album trial version and just bought the full version. How do I transfer my data from the trial version?

When you purchase the full version you’ll be provided with license details to unlock the app. The trial version and the full version are the same app – there is nothing further to download. All of your data will be accessible the next time you run the app.

15. I have a whole spreadsheet of data I’d like to import into the app. How can I do that?

Provided your spreadsheet program can export to CSV format and allows you to specify comma separators and dates in a particular format, you should be able to import it into the app. Orchid Album expects to receive CSV data according to the CSV template file, available in the Downloads section of this site.

16. Can you incorporate some new fields into the app? Can I change the names of any of the data fields?

Incorporating new fields may be possible, but keep in mind that any changes will also need to be made to the iOS app version, where screen real estate is very limited. I’ve tried to select fields that would be useful for most people using the app, and have tried to minimize clutter as much as possible. The Notes field may be used to log information that isn’t captured by any other field. Sorry, the names of the data fields cannot be changed.

17. What is the X icon in the toolbar used for?

The ‘X’ icon (next to the ‘+’ icon in the toolbar) is used to delete a particular orchid, watering schedule, or log. It has no effect until you select an item from the list. Clicking on one of the rows in the table will select that row and highlight it. To delete the highlighted orchid, watering schedule, or log, click the X icon in the toolbar. Alternatively you may select Remove Item from the Edit menu. Note that an alert popup will appear asking if you still wish to delete the orchid. There is no such alert for watering schedules or logs.

18. How do I use the reminder feature?

First, pick a log entry or create a new one. Select Yes next to the Reminder field, then click the OK or Save button. A popup will appear asking if you want to add a reminder to the calendar. Click Add and another window will appear where you can create a calendar entry. If there’s already an entry, it’ll allow you to edit it (or delete it). If you check your calendar in Outlook, the entry should be recorded against the date/time you set.

The idea is you set a future date, set Reminder to Yes, and the log entry will be highlighted on and after that date. The Reminders Due statistic is also updated. Once you’ve taken care of the task (fertilizing, repotting, etc), set Reminder back to No.

19. How do watering schedules work?

Watering schedules are a convenient way to remind you when certain plants in your collection need watering. You can configure how frequently they need watering (Water Every field), how much (Quantity field), when they were last watered, and when they shouldn’t be watered (No Water Between fields).

The app automatically calculates the next watering date based on the information you’ve entered. If there’s a conflict or insufficient information, you’ll see None Scheduled beside the Next Watering field.

The watering schedule entry will be highlighted on the main list when the Next Watering date arrives. Any corresponding orchid entries on the main list will also be highlighted on the same date.

Select the Watering field dropdown menu for individual plants to associate them with a certain watering schedule. If you have a lot of plants, a quicker way is to open the Watering schedule, then click the Orchids To Water tab. To add or remove plants from a certain Watering schedule, click the + button in the top right-hand corner. You can then select which plants to add to the schedule by clicking on them in the list. A blue watering-can icon will appear next to the plants you’ve selected. To remove a plant from the schedule, return to this window, click the plant and the watering-can icon will disappear. Alternatively, select the plant(s) on the Orchids to Water tab and click the – button.

By associating a plant with a watering schedule, the Last Watered and Next Watering fields for each associated plant will be updated automatically whenever the Watering schedule is updated. While it is possible to change the Last Watered field directly for individual plants, it is not recommended since the watering of this plant will become out of sync with the associated watering schedule.

20. How do I use the orchid report feature? How do I view the orchid report?

The orchid report shows a summary of your collection, followed by the data and photos for every orchid, watering schedule, and log entry in your collection. This report can be useful for inventory or insurance purposes, and may be printed from within your web browser.

Click the Export To -> HTML Report lines on the File menu.

(1) Select the Report Folder where you’d like to store the report and the corresponding photos.
(2) Enter a filename in the Report File field. Note that the photos will be stored in a sub-folder of the same name with a _photos suffix.
(3) Select whether you’d like to export a report with Small photos, Medium photos, or Large photos, then click the Export button.
(4) A progress bar window will appear, followed by a popup when the export is complete.

To view the report, locate the Report Folder you specified in (1) and double-click on the Report File you specified in (2). Your web browser will load the orchid report.

21. I have questions, feature requests, or concerns that aren’t listed above. How can I contact you?

You can reach me via email (OrchidAlbum@andrewnicolle.com), on the Orchid Album Facebook page, or on Twitter (I’m @andrewnicolle). I can usually respond to queries within 24 hours. If you like Orchid Album for PC, please spread the word. Thanks!

Tags: , , , , , , ,

Orchid Album for PC Preview

Track your orchid collection on your Windows PC – Coming Soon!

A few months back I announced my plans to bring my popular iOS app, Orchid Album, to the Windows platform. Development is progressing nicely, so I thought I’d give you a quick peek at the progress so far.

The PC version includes most of the same features as the iOS app, with the addition of printing, enhanced search capabilities, and data transfer to and from the iOS version over WiFi. The app will be localized into all the languages supported by the iOS app, including English, French, Italian, German, Spanish, and Portuguese.

To use Orchid Album for PC, you’ll need a Windows PC with a version of Windows from XP up through Windows 10.

I’m planning to release Orchid Album for PC for direct sale via my website. It’ll be available for download as a free trial version, with similar limitations to the Lite iOS version. The full feature-set can be unlocked via purchase.

I don’t yet have a firm release date, but I’m aiming for the first Beta version to be available by the end of 2015.

If you’re interested in learning more about Orchid Album for PC as development progresses, visit the Orchid Album Facebook page or sign up below to be notified via email closer to app launch.

Tags: , , , , , ,

Bonsai Album for PC v1.1.0.0 update now available

Bonsai Album for PC

Bonsai Album makes keeping track of your bonsai or penjing collection easy, whether you’re new to bonsai, a collector, a dealer, or even a bonsai master.

The Bonsai Album for PC v1.1.0.0 update is now available.

For existing customers, click ‘Check for Updates…’ in the Help menu within the app and follow the prompts to update.

This update contains the following changes:

  • Improved performance with large databases when switching between tabs.
  • Swapped Delete and Cancel button order on the item deletion alert.
  • User interface improvements.
  • Bug fixes.

You can learn more about Bonsai Album at my website or on the Bonsai Album Facebook group.

Tags: , , , , , , , ,

Announcing Orchid Album for PC

“Orchid

Since releasing Orchid Album on the iOS App Store last year, I’ve had requests for a Windows PC version. Over the past few years I’ve been working on some other PC apps, but didn’t have the time to work on a PC version of Orchid Album. With the recent release of Bonsai Album for PC and Story Tracker for PC, I’ve finally had a chance to ponder the possibility.

Today I’m pleased to announce my plans to bring Orchid Album to Windows PCs!

Windows versions from XP SP3 through to Windows 8.1 will be supported. I also plan to make any necessary modifications for Windows 10 support, once that’s released. The app will contain many of the features of the iOS version, with the addition of some new features like enhanced search and printing capabilities. You’ll be able to transfer your database to and from the iOS version via WiFi, too.

I’m currently hard at work localizing the iOS version into French, Italian, German, Spanish, and Portuguese for the version 1.3 update. These languages will also be supported in the PC version.

If you’re interested in learning more about Orchid Album for PC as development progresses, visit the Orchid Album Facebook page or sign up below to be notified via email closer to app launch.

UPDATE: Orchid Album for PC is now available!

Tags: , , , , , ,

Introducing Story Tracker for PC

Track your story submissions on your Windows PC – Now Available!

“Story

Today I’m pleased to announce the release of my new PC app, Story Tracker. If you’re a writer who regularly submits your work to publications, you’ll find this to be a helpful tool to keep track of all your submissions.

Way back in 2013 I announced my plans to bring my iOS and Mac app, Story Tracker, to the Windows platform. Despite expecting a steep learning curve, I hoped to release the app by the end of that year. What I didn’t count on was quite so many development hurdles when starting from scratch on a new platform and learning a new programming language at the same time! I also had to continue updating my iOS and Mac apps throughout the development cycle. After all that hard work, I’m pleased with how it turned out.

The PC version is similar to the Mac version, with printing. enhanced search capabilities, and data transfer to and from the iOS version over WiFi. I’ve also included a host of other tweaks and improvements including duplicating entries, right-click context menus, and user-interface improvements. Story Tracker for PC also has a built-in crash-reporting mechanism and software update notifications.

To run Story Tracker on your PC, you’ll need either Windows XP SP3, Windows Vista, Windows 7, Windows 8, or Windows 8.1. The app also requires the Microsoft .NET Framework 4 with the KB2468871 update patch. While I haven’t tested it with Windows 10 yet, I’ll be making any necessary updates for that once it’s released.

The download version initially runs in an unregistered trial mode, limited to 5 stories, 5 markets, and 5 submissions. It will also only allow a single database to be open at a time, and database import is disabled. The full feature-set can be unlocked via purchase, either within the app or via my Web Store.

You can learn more about all the features of Story Tracker here, check out the Frequently Asked Questions page, or like Story Tracker on Facebook.

I’d like to thank all the Beta testers for helping me polish the app, and my family for their patience while I worked on it all this time. I hope you find Story Tracker for PC as useful as I do for keeping track of story submissions. Enjoy!

Tags: , , , , , , , , , , ,

Story Tracker for PC – Frequently Asked Questions (FAQ)

Story Tracker

The following should address any questions or concerns you may have about Story Tracker for PC. I’ll be updating this post as new questions arise. Let me know if I’ve missed anything!

1. When will Story Tracker be available for PCs?

Story Tracker for PC is now available for download from my website here. You can learn more about Story Tracker for PC here.

2. What operating system do I need to be able to run Story Tracker for PC?

The app works on Windows XP SP3 / Vista / 7 / 8 / 8.1 / 10 / 11. It requires the .NET Framework 4, which will be installed automatically if your computer does not already have it. It also requires the .NET KB2468871 update patch.

3. I already have Story Tracker on my iPhone, iPad, or iPod touch. Do I have to buy it again for the PC?

Yes, if you would like to run Story Tracker on your PC, you’ll need to purchase it direct from my site. The PC version includes some additional features over and above the iOS version, including enhanced search and printing capabilities. I first began work on Story Tracker for PC in 2013. The app had to be substantially re-designed and completely re-written for the PC platform. Unfortunately porting the app to the PC wasn’t as simple as you might think!

4. I’m not sure if Story Tracker for PC will suit my needs. Is there a free trial version available?

Yes, it’s available for download from my website here. The app is initially in an unregistered trial mode, limited to 5 stories, 5 markets, and 5 submissions. It will also only allow a single database window, and database import is disabled. That should be enough to give you some idea of whether the app will work for you. Purchasing a license either within the app or via my website unlocks full functionality.

5. I have a Story Tracker database on my iPhone, iPad, or iPod touch. How do I transfer it to Story Tracker for PC?

You’ll need all devices on the same local WiFi network as your PC. Then follow these steps:

(1) Tap the Backup Database button on the Tools screen within the app on your device.
(2) Create a new database within Story Tracker for PC and save it to your Documents folder.
(3) Click the Import Database button in the document window toolbar within Story Tracker for PC. This is the button next to the printer button. The button has an arrow pointing to the right, away from the device icon. You can also select the Import from -> Story Tracker Mobile App item in the File menu.
(4) The Import Database window will appear. You should see your device shown in the Devices section. If it isn’t there, double-check that you’ve selected Backup Database (or Export Database) on the Tools screen within Story Tracker on your device. Check the Messages box in Story Tracker for PC for helpful information.
(5) Select the device you want to import from, then select Restore Complete Database in the Import Options section. You may also choose to Import Stories and Markets, Import Stories, or Import Markets.
(6) Once you’re satisfied with the selected device and import options, click the Import button.
(7) An alert will appear indicating whether the import was successful. Click Ok.
(8) The database in Story Tracker for PC should now match the database on your device.

Note that the above steps will completely replace the contents of the Story Tracker database within Story Tracker for PC, unless you’ve chosen not to restore the complete database. In that case, you may see duplicate entries in your database after the import is complete.

6. I have a Story Tracker database in Story Tracker for PC I’d like to transfer to Story Tracker on my iPhone, iPad, or iPod touch. How do I accomplish this?

The steps are similar to question 5 above, except you must select either Restore Database or Import Database on your device, and click the Export Database button in the document window toolbar within Story Tracker for PC. This is the toolbar button with the arrow pointing toward the device icon. When the export is complete, you should consult the pop-up alert on your device for further instructions.

7. I have an iPad, an iPhone, and a PC. How do I keep the databases in sync between all of these devices?

Story Tracker currently doesn’t have a simple means of keeping databases synchronized on separate devices. However, it is still possible to transfer the database between devices manually. You first need to backup the database from the device with the most current copy to your computer (or from your computer to the device). The steps for achieving this are shown above in questions 5 and 6. A good workflow is to use your PC as a hub for the database, updating that after you’ve made changes on your device.

8. I have the Story Tracker trial version and just bought the full version. How do I transfer my data from the trial version?

When you purchase the full version you’ll be provided with license details to unlock the app. The trial version and the full version are the same app – there is nothing further to download. All of your data will be accessible the next time you run the app.

9. I have a whole spreadsheet of submission data I’d like to import into the app. How can I do that?

Provided your spreadsheet program can export to CSV format and allows you to specify comma separators and dates in a particular format, you should be able to import it into the app. Story Tracker expects to receive CSV data according to the CSV template file, available in the Downloads section of the site. This template file can also be found via the File -> Import from -> CSV menu sequence within the app.

10. Can you incorporate some new fields into the app? Can I change the names of any of the data fields?

Incorporating new fields may be possible, but keep in mind that any changes will also need to be made to the iOS app version, where screen real estate is very limited. I’ve tried to select fields that would be useful for most writers using the app, and have tried to minimize clutter as much as possible. The Notes field may be used to log information that isn’t captured by any other field. Sorry, the names of the data fields cannot be changed.

11. What is the X icon in the toolbar used for?

The ‘X’ icon (next to the ‘+’ icon in the toolbar) is used to delete a particular story, market, or submission. It has no effect until you select an item from the list. Clicking on one of the rows in the table will select that row and highlight it. To delete the highlighted story, market, or submission, click the X icon in the toolbar. Alternatively you may select Remove Item from the Edit menu. Note that if a particular story or market is associated with any submissions, an alert will appear asking if you still wish to delete the story or market. If there are no associated submissions, the highlighted item will be deleted immediately.

12. What does trunked mean?

The Trunked? field appears on the Story Info screen, with options of Yes or No. It essentially means you’ve put the story away in the trunk (or drawer, filing-cabinet, or hard-drive) and don’t plan to submit it anywhere again. You’d typically do this when you’ve exhausted the list of markets you planned to send the story to, or if you don’t think it’s good enough to send anywhere. In practical terms, when Trunked? is set to Yes the story will no longer appear in the drop-down list when you create or modify a submission. You can decide to un-trunk the story at any time by setting the state back to No.

13. I have questions, feature requests, or concerns that aren’t listed above. How can I contact you?

You can reach me via email (StoryTracker@andrewnicolle.com), on the Story Tracker Facebook page, or on Twitter (I’m @andrewnicolle). I can usually respond to queries within 24 hours. If you like Story Tracker for PC, please spread the word. Thanks!

Tags: , , , , , , , , , , , , ,

Story Tracker for PC Preview

Track your story submissions on your Windows PC – Coming Soon!

Quite awhile back I announced my plans to bring my iOS and Mac submission tracking app, Story Tracker, to the Windows platform. After a prolonged development struggle, today I can finally present an early look at the interface.

While it looks very similar to the Mac version, the PC version was actually a total rewrite. I’ve had to learn a new programming language, and come up to speed with development on an unfamiliar platform.

The PC version will include much the same features as the Mac, including printing. enhanced search capabilities, and data transfer to and from the iOS version over WiFi. It will support Windows XP, Vista, 7, 8, and 8.1. I also plan to support Windows 10 after that’s released.

I’m planning to release Story Tracker for PC for direct sale via my website. It’ll be available for download as a free trial version, with similar limitations to the Lite iOS version. The full feature-set can be unlocked via purchase.

Development is proceeding swiftly, so I’m hoping to release the app sometime within the next 2-3 months.

If a PC version of Story Tracker sounds interesting to you, and you’d like to Beta test or just be notified when the app is closer to launch, sign-up here. I’ll also be posting the occasional update on the Story Tracker Facebook page.

Tags: , , , , , ,

Introducing Bonsai Album for PC

Track your Bonsai tree collection on your Windows PC – Now Available!

Bonsai Album

Today I’m pleased to announce the release of my first PC app, Bonsai Album. If you’re into bonsai and are looking for a tool to make keeping track of your trees easier, you can’t go wrong with this.

Almost two years ago I announced my plans to bring my iOS and Mac app, Bonsai Album, to the Windows platform. At the time I thought all the pieces would fall into place, and I would be able to deliver this new app within a year. Well, things didn’t go quite so smoothly as I expected! Between juggling updates to my iOS and Mac apps, and learning app development over from scratch on a new platform, it took far longer than I’d imagined. I’m glad I persisted through the many hundreds of hours of challenges and frustration, though. I’m very happy with the end result.

The PC version is very similar to the Mac version. It includes printing. enhanced search capabilities, and data transfer to and from the iOS version over WiFi. I’ve also included some features requested from Beta testers, like duplicating bonsai entries, right-click context menus, displaying Last Repotted dates, and a host of other tweaks and improvements. Bonsai Album for PC also has a built-in crash-reporting mechanism and software update notifications.

Localization into multiple languages is very important for modern apps. I’ve localized the PC version of Bonsai Album into English (obviously!), Japanese, French, Italian, German, Spanish, and Portuguese. This also includes every aspect of the installation and ordering process. Clicking on any of the links below will take you to the information page for the app in each language:

English, 日本語, Français, Italiano, Deutsch, Español, Português

To run Bonsai Album on your PC, you’ll need either Windows XP SP3, Windows Vista, Windows 7, Windows 8, or Windows 8.1. The app also requires the Microsoft .NET Framework 4 with the KB2468871 update patch. While I haven’t tested it with Windows 10 yet, I’ll be making any necessary updates for that once it’s released.

The download version initially runs in an unregistered trial mode, limited to 3 bonsai, 3 pots, and 3 logs, with 3 photos each. It will also only allow a single database to be open at a time, and database import is disabled. The full feature-set can be unlocked via purchase, either within the app or via my Web Store.

You can learn more about all the features of Bonsai Album here, check out the Frequently Asked Questions page, or like Bonsai Album on Facebook.

I’d like to express my sincere thanks to all the Beta testers for helping me polish the app, and to everyone else for their patience (especially family!) while I worked away on the app for years on end. I hope you’ll agree it was worth the wait!

Tags: , , , , , , ,

Bonsai Album for PC – Frequently Asked Questions (FAQ)

Bonsai Album

The following should address any questions or concerns you may have about Bonsai Album for PC. I’ll be updating this post as new questions arise. Let me know if I’ve missed anything!

1. When will Bonsai Album be available for PCs?

Bonsai Album for PC is now available for download from my website here. You can learn more about Bonsai Album for PC here.

2. What operating system do I need to be able to run Bonsai Album for PC?

The app works on Windows XP SP3 / Vista / 7 / 8 / 8.1 / 10 / 11. It requires the .NET Framework 4, which will be installed automatically if your computer does not already have it. It also requires the .NET KB2468871 update patch. Outlook 2010 is required to store reminders on your computer’s calendar.

3. I already have Bonsai Album on my iPhone, iPad, or iPod touch. Do I have to buy it again for the PC?

Yes, if you would like to run Bonsai Album on your PC, you’ll need to purchase it direct from my site. The PC version includes some additional features over and above the iOS version, including photo organization, enhanced search, and printing capabilities. I first began work on Bonsai Album for PC in 2013. The app had to be substantially re-designed and completely re-written for the PC platform. Unfortunately porting the app to the PC wasn’t as simple as you might think!

4. I’m not sure if Bonsai Album for PC will suit my needs. Is there a free trial version available?

Yes, it’s available for download from my website here. The app is initially in an unregistered trial mode, limited to 3 bonsai, 3 pots, and 3 logs, with 3 photos each. It will also only allow a single database open at a time, and database import is disabled. That should be enough to give you some idea of whether the app will work for you. Purchasing a license either within the app or via my website unlocks full functionality.

5. Will Bonsai Album for PC be localized into my language soon?

Possibly. Bonsai Album is currently localized into English, Japanese, French, Italian, German, Spanish, and Portuguese.

6. Is it possible to sort the bonsai by species, rather than name?

Click Preferences… on the Tools menu and select the “Sort bonsai by species” checkbox under Sort Options. Close the window and you’ll find all bonsai are now sorted by species. Repeat these steps to sort by name again.

7. What is the purpose of the Type field on the Log Info screen?

The type field is used by the app to determine what should be displayed in the Logs list for that log entry. For instance, selecting Bonsai will show the bonsai name selected in the Bonsai field, selecting Pot will show the Pot name in the Pot field, and Note will show a brief summary taken from the Notes field. Select either Bonsai, Pot, or Note in the Type field depending on what information that particular log entry is recording.

8. How do I re-order the photos on the Bonsai Info, Pot Info, or Log Info screens?

After the entry has been saved, double-click on it and then click on the All Photos section. This will show all the photos associated with the Bonsai, Pot, or Log. Click and hold the mouse button on the photo you’d like to organize on the Info screen, and move the mouse to where you’d like the photo to be moved. Release the mouse button when you’re done.

To move a photo into one of the primary photo slots on the Bonsai Info, Pot Info, or Log Info screens, arrange the photos in the All Photos section. The primary photo slots will now reflect the new order.

9. How do I add text captions to my photos? How can I hide them to take a closer look at the photo?

Double-click on the photo you’d like to add a caption to in the All Photos section of the Bonsai Info, Pot Info, or Log Info window. Click the word balloon icon at the top of the window, then in the text box that appears, type in the text caption you’d like to associate with that photo. Click on the photo to end editing the caption. The new or modified text caption will now be displayed. Note that only the first few lines of the caption will be superimposed over the photo. To hide the caption, click once on the photo. You can scroll between the photos by clicking the left and right arrow buttons, and zoom-in by resizing the photo window.

10. How do I capture sold, stolen or dead trees, broken pots, or other events?

The place for capturing these events is on the Log Info window. Create a new Log entry, click the Event field and type in the new Event (Sold, for instance). The new Event will be saved when you click the OK or Save button. It will then be available for use with this and other log entries. In the Bonsai field (or Pot field), select the corresponding tree (or pot). Set the Type field to Bonsai (or Pot). Set the date the Event occurred, and add any relevant photos or notes. Click Save, and the new dated Log entry will appear in the list. Now when you tap the Log History button on the Bonsai Info (or Pot Info) window, you’ll see the complete history of the tree (or pot).

11. I have a Bonsai Album database on my iPhone, iPad, or iPod touch. How do I transfer it to Bonsai Album for PC?

You’ll need all devices on the same local WiFi network as your PC. Then follow these steps:

(1) Tap the Backup Database button on the Tools screen within the app on your device.
(2) Create a new database within Bonsai Album for PC and save it to your Documents folder.
(3) Click the Import Database button in the document window toolbar within Bonsai Album for PC. This is the button next to the printer button. The button has an arrow pointing to the right, away from the device icon. You can also select the Import from -> Bonsai Album Mobile App item in the File menu.
(4) The Import Database window will appear. You should see your device shown in the Devices section. If it isn’t there, double-check that you’ve selected Backup Database (or Export Database) on the Tools screen within Bonsai Album on your device. Check the Messages box in Bonsai Album for PC for helpful information.
(5) Select the device you want to import from, then select Restore Complete Database in the Import Options section. You may also choose to Import Bonsai and Pots, Import Bonsai, or Import Pots.
(6) Once you’re satisfied with the selected device and import options, click the Import button.
(7) After the progress bar completes, an alert will appear indicating whether the import was successful. Click OK.
(8) The database in Bonsai Album for PC should now match the database on your device.

Note that the above steps will completely replace the contents of the Bonsai Album database within Bonsai Album for PC, unless you’ve chosen not to restore the complete database. In that case, you may see duplicate entries in your database after the import is complete.

12. I have a Bonsai Album database in Bonsai Album for PC I’d like to transfer to Bonsai Album on my iPhone, iPad, or iPod touch. How do I accomplish this?

The steps are similar to question 11 above, except you must select either Restore Database or Import Database on your device, and click the Export Database button in the document window toolbar within Bonsai Album for PC. This is the toolbar button with the arrow pointing toward the device icon. When the export is complete, you should consult the pop-up alert on your device for further instructions.

13. I have an iPad, an iPhone, and a PC. How do I keep the databases in sync between all of these devices?

Bonsai Album currently doesn’t have a simple means of keeping databases synchronized on separate devices. However, it is still possible to transfer the database between devices manually. You first need to backup the database from the device with the most current copy to your computer (or from your computer to the device). The steps for achieving this are shown above in questions 11 and 12. A good workflow is to use your PC as a hub for the database, updating that after you’ve made changes on your device.

14. I have the Bonsai Album trial version and just bought the full version. How do I transfer my data from the trial version?

When you purchase the full version you’ll be provided with license details to unlock the app. The trial version and the full version are the same app – there is nothing further to download. All of your data will be accessible the next time you run the app.

15. I have a whole spreadsheet of data I’d like to import into the app. How can I do that?

Provided your spreadsheet program can export to CSV format and allows you to specify comma separators and dates in a particular format, you should be able to import it into the app. Bonsai Album expects to receive CSV data according to the CSV template file, available in the Downloads section of this site.

16. Can you incorporate some new fields into the app? Can I change the names of any of the data fields?

Incorporating new fields may be possible, but keep in mind that any changes will also need to be made to the iOS app version, where screen real estate is very limited. I’ve tried to select fields that would be useful for most people using the app, and have tried to minimize clutter as much as possible. The Notes field may be used to log information that isn’t captured by any other field. Sorry, the names of the data fields cannot be changed.

17. What is the X icon in the toolbar used for?

The ‘X’ icon (next to the ‘+’ icon in the toolbar) is used to delete a particular bonsai, pot, or log. It has no effect until you select an item from the list. Clicking on one of the rows in the table will select that row and highlight it. To delete the highlighted bonsai, pot, or log, click the X icon in the toolbar. Alternatively you may select Remove Item from the Edit menu. Note that an alert popup will appear asking if you still wish to delete the bonsai or pot. There is no such alert for logs.

18. How do I use the reminder feature?

First, pick a log entry or create a new one. Select Yes next to the Reminder field, then click the OK or Save button. A popup will appear asking if you want to add a reminder to the calendar. Click Add and another window will appear where you can create a calendar entry. If there’s already an entry, it’ll allow you to edit it (or delete it). If you check your calendar in Outlook, the entry should be recorded against the date/time you set.

The idea is you set a future date, set Reminder to Yes, and the log entry will be highlighted on and after that date. The Reminders Due statistic is also updated. Once you’ve taken care of the task (fertilizing, repotting, etc), set Reminder back to No.

19. How do I use the bonsai report feature? How do I view the bonsai report?

The bonsai report shows a summary of your collection, followed by the data and photos for every bonsai, pot, and log entry in your collection. This report can be useful for inventory or insurance purposes, and may be printed from within your web browser.

Click the Export To -> HTML Report lines on the File menu.

(1) Select the Report Folder where you’d like to store the report and the corresponding photos.
(2) Enter a filename in the Report File field. Note that the photos will be stored in a sub-folder of the same name with a _photos suffix.
(3) Select whether you’d like to export a report with Small photos, Medium photos, or Large photos, then click the Export button.
(4) A progress bar window will appear, followed by a popup when the export is complete.

To view the report, locate the Report Folder you specified in (1) and double-click on the Report File you specified in (2). Your web browser will load the bonsai report.

20. I have questions, feature requests, or concerns that aren’t listed above. How can I contact you?

You can reach me via email (BonsaiAlbum@andrewnicolle.com), on the Bonsai Album Facebook page, or on Twitter (I’m @andrewnicolle). I can usually respond to queries within 24 hours. If you like Bonsai Album for PC, please spread the word. Thanks!

Tags: , , , , , , ,